How to Bulk Schedule Inspections
Use the inspection schedule screen for quick scheduling
Once an inspection is created or has been requested through CONNECT, it will display on the Inspection Schedule list. You can access the Inspection Schedule screen by hovering over the inspection tab and selecting the Inspection Schedule from the pop-up menu.

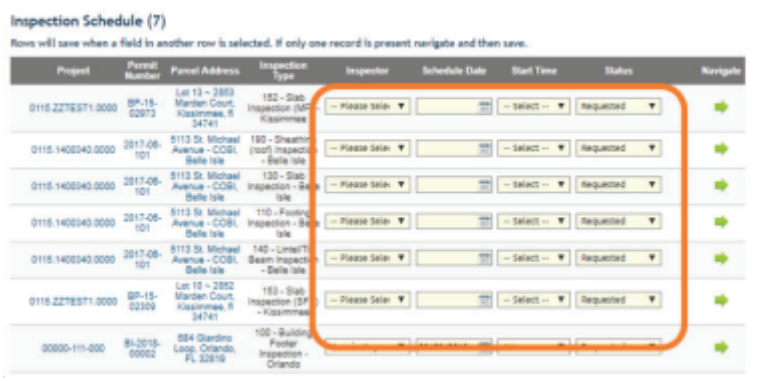
Next, on the Inspection Schedule screen you can start to schedule inspections. Each inspection has a row, and then continue row by row to select an inspector, and schedule the date, the start time, and status.
*Note - Status must be set to Scheduled to show up on the Inspector's device.

As you make the selections, you must select a choice in the next row to save the previous row selection. For example, when opening the Inspectordrop down, the following row will save the entry of the previous row.

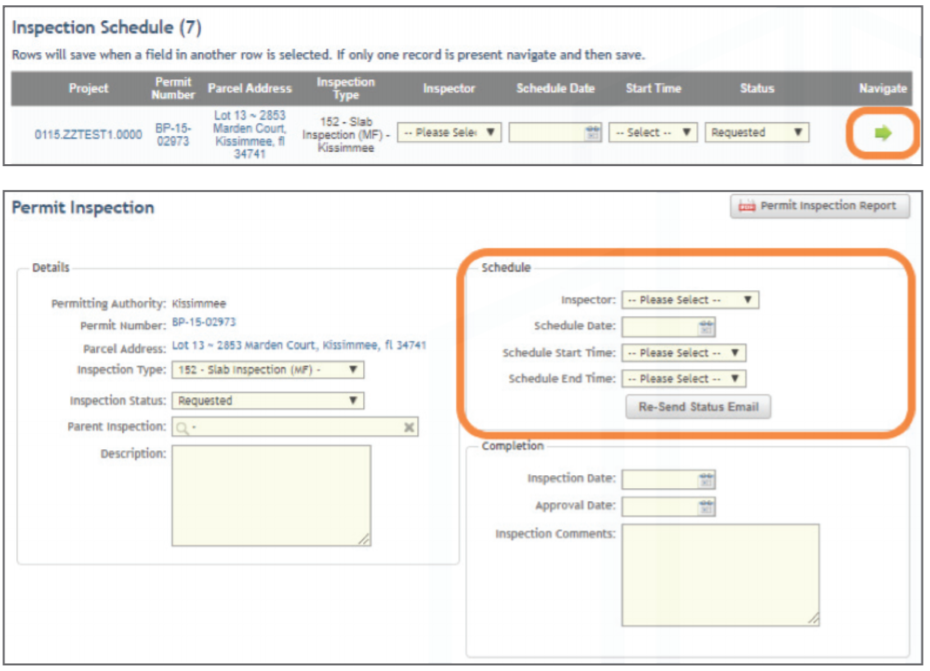
If there is only one inspection on the list, click the green arrow on the right side of that inspection under the heading Navigate, and it will navigate you to the Inspection Schedule Screen to complete the scheduling process.


